Creating Your First Post
Creating and publishing your first post
 Written by RockyThemes
To create a post navigate to your WordPress admin dashboard -> Posts -> Add New
Enter a Title for your new post and start adding some content – paragraph, images, add your own content.

Next fill your post in the categories you want using the Categories select box from the right sidebar of your editing screen.

You can choose as many categories as you want but we recommend to keep posts in a maximum of 3-4 categories at most.
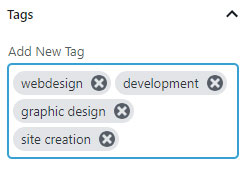
Similar to the Categories, each post can also have its own tags. Use the Tags box to add the tags you want for each post. Separate each tag with a comma character: “,”
The next step we have to take is to set at least one Featured Image for our new post.

From the right sidebar of your editing window -> Featured Image -> click on Set featured Image and upload or choose an image from your Media library.
The image size set as the Featured Image should be at least 800px wide. We recommend using Featured Images with a width of 1000px for site layouts that are bigger than 1400px.
If you want to remove the current Featured Image and set a different image, simply click on Replace image button or the Remove featured image link
Publish your new post by click the Publish button

View your newly created post by clicking on the View Post link that appears on your Editing window.
You should see something similar to the following image:

Repeat these steps for all the posts you want to create.