Configuring the WooCommerce Plugin
How to configure the WooCommerce plugin
 Written by RockyThemes
After installing and activating the WooCommerce plugin, you were prompted to also configure the plugin with your own details.
If that step was skipped, you can still do it now.
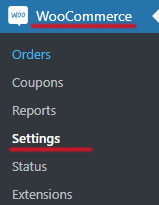
Navigate to your WordPress admin dashboard -> WooCommerce -> Settings
The General tab, allows you to configure the Store Address as well as the General Options like selling location, shipping location, default customer location, enable taxes, etc.
Click the Products Tab at the top of the window.
Make sure that under Shop pages -> Shop page you have your Shop page selected – if you imported the Nimva3 content, that page is available.

If you did not imported the Nimva 3 content, you should create a new blank page and call it Shop. Next choose that page as the Shop page.
Next navigate to the Advanced tab.
Set the Cart page, Checkout page and My Account page with the corresponding pages.
If the pages do not exist, create each one as seen below:
- Cart page – create a new page, enter Cart for Title and in the content area add the following shortcode: [woocommerce_cart]
- Checkout page – create a new page, enter Checkout for Title and in the content add the following shortcode: [woocommerce_checkout]
- My account – create a new page, enter My Account for Title and in the content area add the following shortcode: [woocommerce_my_account]
Set each page accordingly to the image below:

Save changes and your Store is now configured for selling/shopping. Start creating products and publish them on your site so users can start buying them.