Choosing where the Footer will be Displayed using Elementor
Using Display Settings to choose where the Footer will be displayed.
 Written by RockyThemes
Navigate to your WordPress admin dashboard -> Creativo Elements -> Footers.
Edit one of the existing headers. If there are currently no headers created, follow this tutorial to create your first footer.
Navigate to Settings -> Display Settings.
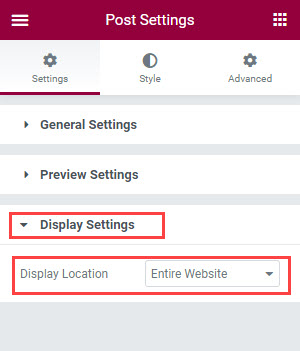
Under Display Location -> choose where the newly created Header will be used.
Choose Entire Website if you want to header to be used everywhere on your site.
Available options for Display Location include:
- Entire Website
- Singular
- Archive
- 404 Page
- Search Page
- Blog / Posts Page
- Front / Home Page
- Author Archive
It’s useful to have different Footer layouts and assign them accordingly to the post type being used.
For example we can create a Footer layout for pages and a different type of footer for Blog Posts. There are no limitations to the number of Footer layouts that we can create or use.
Assigning the Footer to a certain Page, Post, Portfolio or Product
Under Display Settings -> Display Location -> choose Singular.
The Singular Type select box will appear below it.
Available options are:
- All Singular
- Custom Single Posts
- Single Posts of a Post Type
Choose Custom Single Posts.
Under Single Posts click once and start typing the name of the page, post, portfolio, product or any other custom post type that you want to use.
Add as many items as you like.

Hit the Update button.
The Footer will be assigned only to the specified items.