How to use the Elementor Page Builder
Getting started with the Elementor Page Builder and Creativo theme.
 Written by RockyThemes
After installing Creativo you can choose to import a Creativo PreBuilt Website or you can choose to create everything from scratch, using Creativo, Elementor Page Builder and Creativo Elements.
If no Creativo PreBuilt Website was imported, we can still install Elementor by navigating to Creativo -> Plugins area:

Hit the Install button for both Elementor plugin and Creativo Elements plugin.
It’s very important that both Elementor and Creativo Elements plugins are installed and active. If you do not install Creativo Elements plugin, you won’t be able to use any of the elements/widgets we created for Elementor.
After both plugins have been installed we can get started.
The Elementor page builder can be used by default, on Pages.
Navigate to your WordPress admin dashboard -> Pages -> Add New.
Enter a Title for your new page and from the Right Sidebar of your editing window -> Page tab -> Template -> choose Elementor Full Width.

After doing this hit the Publish button.
Now click on Edit with Elementor.
We are now being taken to the actual Elementor Page Builder interface, where we will be able to build anything we want on our page, by using Drag and Drop actions.

From the left we can choose which element to add.
Before adding elements, we should first create a new Section.
Sections will hold the actual elements while allowing us to create custom layouts, for example: a 3 columns layout or a 4 columns layout.
Click on the + button and choose a section layout, also known as Structure, to be added.
For this example we are going to use a 3 Columns layout.

Our new structure should appear on the page, in a 3 columns layout.

Pretty cool. Now we can start adding some elements. Let’s try using some Buttons elements.
From the left Elementor sidebar, click on the button on the right of the Edit Section title.

We are now taken in the Elements section where we can either search for the element/widget we want to use or navigate through the available sections.
By default the Basic section will be collapsed displaying the available elements/widgets of Elementor. Make sure to close that section by clicking on it.
Scroll down until you find the Creativo section.
This is where all the Creativo Elements exist. These, are special elements/widgets that were created by us, RockyThemes, to best suit our needs for our theme.
These elements/widgets will only work with Creativo theme and only if the Creativo Elements plugin is enabled.

As you can see the Creativo Elements/Widgets are colored in Blue and also have a small “C” letter in the top left corner of each element.
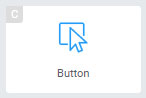
Position your mouse over the Button element.
Next click on it – and without releasing the mouse button – drag the element into one of the three available columns

Now that the element has been added on the page we can use the provided settings to make the button the way we want.
The Content tab -> Text is where the actual Text for the button can be changed. Either type your text here or click on the actual Button, at the end for the Click here text and use your keyboard to type in the text that you want to appear on the button.
Set a link for your button and change the alignment to Center using the Alignment settings.

Icons are optional but can be set by easily clicking the + button under Icon section.
Next let’s move to the Style tab. Click on it and the actual Styling options will be provided.

Here we can alter the colors, background, button effects, border radius, paddings as well as the Typography of the button.
There are also options for hover state so click on the Hover tab to access these settings.
Once you are satisfied with your changes, hit the Update button located at the bottom right corner of the Elementor panel.
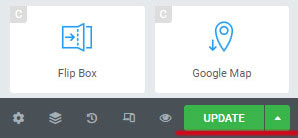
The page will now be updated with the changes we performed:
- we added a new 3 Columns section
- we added our own button
- we customized our new button
To actually view our changes click the Hamburger menu that appears in the Top Left corner of the Edit Button.
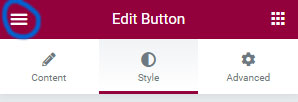
In the new section provided, click on View Page.
We can now view our newly created page with the Button element appearing in one of the three columns.
After viewing our current page with the new content, we can head back and edit the page again using the Elementor Page Builder.
Do edit the current page, from the Top Bar -> click on Edit with Elementor button and we are going to be taken back to the Editor window.

Edit the button or add more elements.
We hope you found this tutorial useful in the process of creating your content using Elementor and Creativo Elements.